- This is the first tournament game in which I scored with a decisive sacrificial attack.
Cox-Moore
1. e4, e5
2. Nf3, Nc6
3. Bc4, Bc5
4. b4
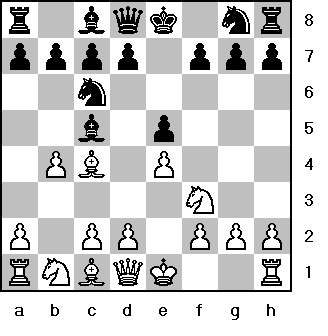
The Evans Gambit. White Sacrifices a pawn in order to rapidly build a pawn center and gain a lead in the devolopment of his pieces. White's compensation for the pawn minus is the strong pawn center, active piece play, and attacking prospects in the middlegame. The Evans has suffered in reputation because Steinitz the first official world champion often wrote that it was unsound, and the "Lasker Defense" put it out of commission for about 50 years, though improvements have been found. It should be noted that Steinitz was +10 -1 =1 on the White side of the Evans in his career. His score on the black side versus Chigorin was +5 -12 =6. One would think that with such results one would be a supporter of the opening rather than a critic. The Evans Gambit remains a powerful weapon in club play today.
4..Bxb4
5. c3, Ba5
The so-called "Normal Variation", the point of blacks move is to maintain the hit pressure on d4 and c3 with options of capturing on those squares. The main Alternative is 5...Bc5, also playable is Anand's 5...Be7.
6. d4
The Point of Whites pawn sacrifice to play this freeing central advance.
6...exd4
7. 0-0, dxc3
By accepting this last pawn Black has entered into the "Compromised Defense", in this variation he takes all the pawns offered and tries to whether the storm. In my view taking this last pawn is dubious as white gets a really strong attack. Better is 7..d6 or 7...Nge7.
8. Qb3, Nh6!?
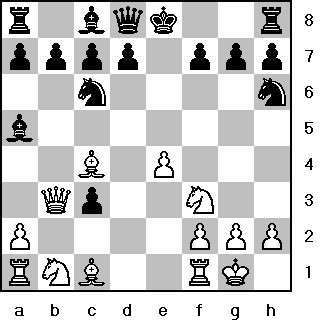
This last move is a novelty. Moore analyzes 9. Bxh6, gh 10. Bxf7+, Kf8! when despite having lost castling priveledges Black remains two pawns ahead with good chances of reaching a superior end game.
9. Nxc3
I will have none of it and continue to develop my forces. This is the only correct way to play the Evans as white.
9...Qf6
Apparently pinning the knight on c3 to the rook as he continues with his general strategy of pressure on c3 and d4 but..
10. Nd5!
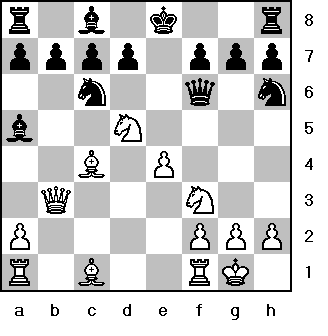
I offer the rook to gain an attack on the enemy king left in the center of the board.
10...Qxa1
Somewhat Better was 10...Qg6 though White keeps a strong initiative after 11. Bf4!, d6 12. Bd3 intending the advance e5 and Nh4.
11. Bxh6
Removing the defender of f7 at the right moment.
11...Qxf1+
The two rooks are easily worth the Queen so black retains a solid material edge.
12. Kxf1, gxh6
White has a commanding lead in development, central control, and a clear target in blacks shattered kingside, this more than makes up for whites material minus. The enemy king trapped in the center cannot be happy.
13. Nf6+ Ke7
14. Qb2, Rf8
15. Nd5+, Ke8
16. Qf6
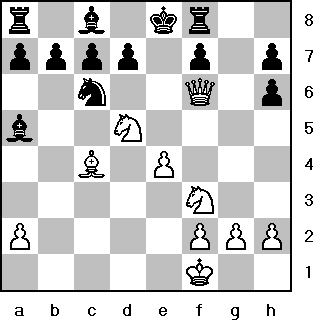
This Queen invasion finishes black.
16...a6
He has no good defense.
17. Ne5!, d6
White has a Mate in 4! Notice 17...Nxe5?? 18. Qxe5+ and mate next move at e7.
18. Nxc7+!
Clearing the a2-g8 diagnol for my bishop.
18...Bxc7
19. Bxf7+, Rxf7
20. Qxf7+, Kd8
21. Qf8#
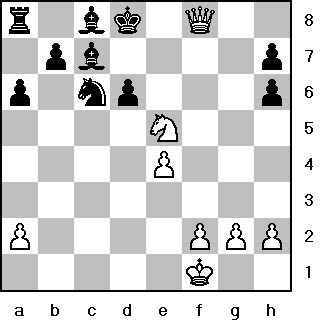
Checkmate!